

BUBF: "Butt Ugly But Fast!"
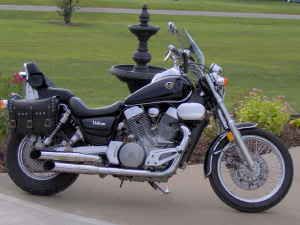
BEFORE:
![Image]()
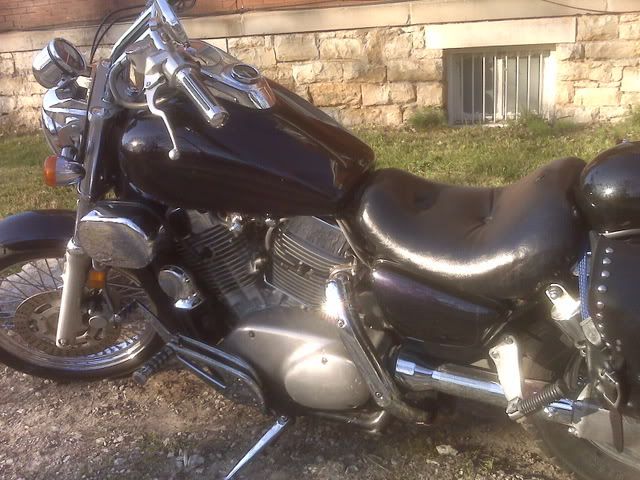
This is how I purchased it. Pics do this bike justice, as the minor imperfections aren't visible.
The bike had been taken care of by the first owner, but the guy I bought it from (2nd owner) only rode it about 400 miles total, but managed to lay it down... twice.
The result was minor dents on both sides of the tank where the emblems hit. And a torn up handlebar where the windshield mounts scratched the chrome off.
The switch covers on the handlebars weren't properly tightened, so they sagged, and scratched the tank on one side.
Also, the guy advertised the bike as a 1998. I didn't pay close enough attention when I signed the title, but when I called for insurance, I was surprised to find that it was a 1996! If it were a dealership, I'd have done something about it, but since it was a private owner, I just went with it.
All things considered, I was happy to have my first bike.
PHASE 1: Strip it Down, Go Shopping!
I removed the following items:
* Windshield
* "Chrome" strips around Fenders, Fuel tank
* Tool bags
* Upper passenger pillon
* Sissy Bar
* Tail Light Assembly
* All emblems
I bought and installed the new handlebars (OEM "Drag" style.)
I had some tires mounted. I went a step or two larger than stock. 170mm, as opposed to the 150mm's.
I had to replace a part of the gear shifting mechanism. It wasn't as easy as it seems, as this was part of the Jardine forward controls. I ended up fabricating a replacement from an old shifter. Miracles can happen with only a hacksaw and a drill,
![Image]()
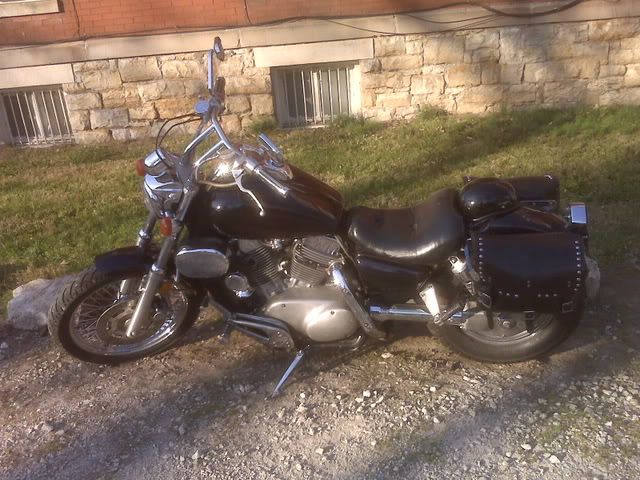
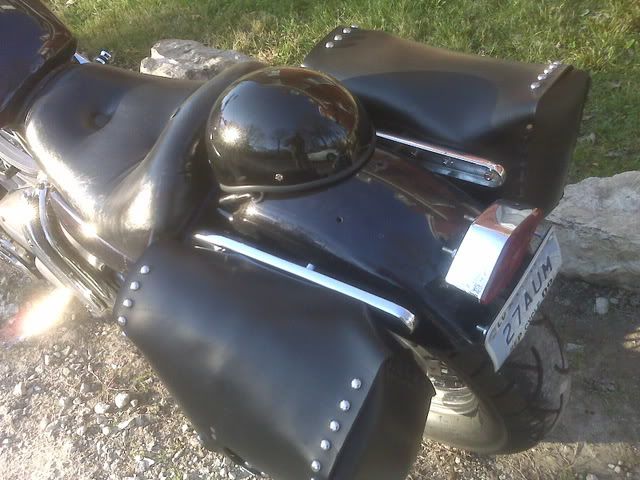
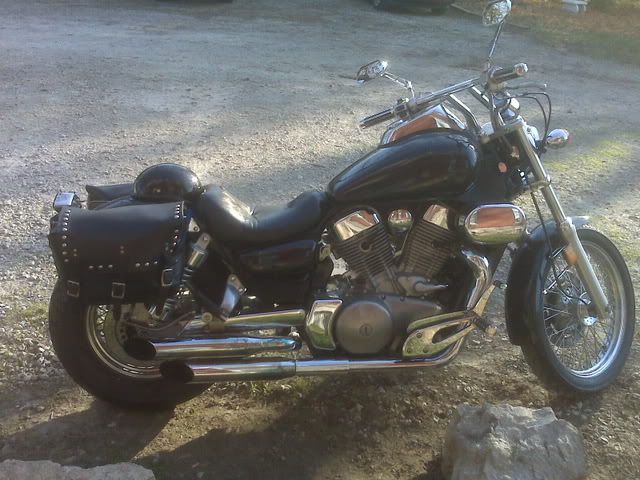
Now, I've got some parts on order, but this is the bike as it is now:
![Image]()
![Image]()
![Image]()
![Image]()
The way the fender was cut makes the bike look shorter than it really is. I'm not happy with the seat, fender, or tail light.
ON ORDER:
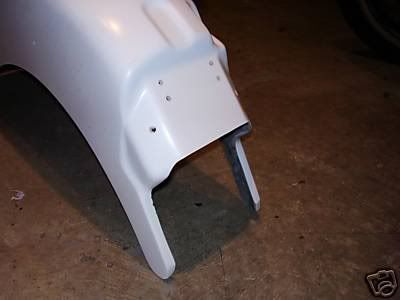
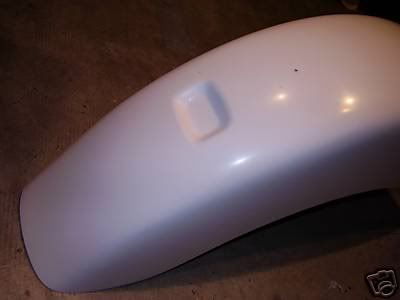
Fender: (The fender on my bike was cut, poorly, for a custom tail light assembly.)
![Image]()
![Image]()
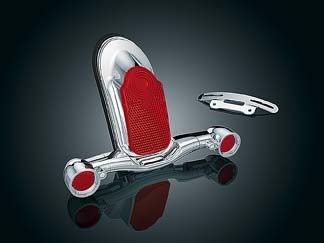
Tail Light:
Tombstone by Kuryakyn
![Image]()
Seat:
Corbin Gunfighter: (Mine will be all black, no flames.)
![Image]()
I'd love to hear suggestions, comments, criticism, and general feedback.
During Phase 2, I'll hang all the newly ordered parts, and post some more pics.
Phase 3 is a paint job / dent removal (fuel tank). I'm 90% set on a Flat Black. I'm also considering wrapping the pipes. Truth is, I don't like "Flashy" chrome. Any feedback on this?
At the beginning of October, 2008, I bought my first bike, a VN1500 C3, Vulcan L. I paid too much for it. NADA lists it at a retail of $2700'ish (on the high end.) With 18,000 miles, it was in generally good order (Squeaky clean engine, no leaks.) ...I paid 3500.The VROC Website said:
BEFORE:
This is how I purchased it. Pics do this bike justice, as the minor imperfections aren't visible.
The bike had been taken care of by the first owner, but the guy I bought it from (2nd owner) only rode it about 400 miles total, but managed to lay it down... twice.
The result was minor dents on both sides of the tank where the emblems hit. And a torn up handlebar where the windshield mounts scratched the chrome off.
The switch covers on the handlebars weren't properly tightened, so they sagged, and scratched the tank on one side.
Also, the guy advertised the bike as a 1998. I didn't pay close enough attention when I signed the title, but when I called for insurance, I was surprised to find that it was a 1996! If it were a dealership, I'd have done something about it, but since it was a private owner, I just went with it.
All things considered, I was happy to have my first bike.
PHASE 1: Strip it Down, Go Shopping!
I removed the following items:
* Windshield
* "Chrome" strips around Fenders, Fuel tank
* Tool bags
* Upper passenger pillon
* Sissy Bar
* Tail Light Assembly
* All emblems
I bought and installed the new handlebars (OEM "Drag" style.)
I had some tires mounted. I went a step or two larger than stock. 170mm, as opposed to the 150mm's.
I had to replace a part of the gear shifting mechanism. It wasn't as easy as it seems, as this was part of the Jardine forward controls. I ended up fabricating a replacement from an old shifter. Miracles can happen with only a hacksaw and a drill,

Now, I've got some parts on order, but this is the bike as it is now:
The way the fender was cut makes the bike look shorter than it really is. I'm not happy with the seat, fender, or tail light.
ON ORDER:
Fender: (The fender on my bike was cut, poorly, for a custom tail light assembly.)
Tail Light:
Tombstone by Kuryakyn
Seat:
Corbin Gunfighter: (Mine will be all black, no flames.)

I'd love to hear suggestions, comments, criticism, and general feedback.
During Phase 2, I'll hang all the newly ordered parts, and post some more pics.
Phase 3 is a paint job / dent removal (fuel tank). I'm 90% set on a Flat Black. I'm also considering wrapping the pipes. Truth is, I don't like "Flashy" chrome. Any feedback on this?


